Discover Takaya Shrine: A Hiking Guide to Shikoku’s ‘Torii in the Sky’

Perched on a mountain in Kagawa Prefecture, Takaya Jinja Shrine (高屋神社) is a hidden gem that rewards hikers with one of the most breathtaking views in Shikoku. Known as the “Torii in the Sky”, its stunning shrine gate stands at the edge of the 404-meter Mt. Inazumi, overlooking the coastal city of Kanonji and Seto Inland Sea below. The hike up is an adventure: a little-known forest trail, a bit of a challenge, and a fantastic payoff at the top!
If you're looking for a picturesque, off-the-beaten-track hike in Shikoku, this is one I’d highly recommend! This hike was one of the highlights of my one-week road trip around Shikoku and has become one of my favourite hikes in Japan. In this article, I'll give you an overview of the hike and some tips based on my own experience.
About Takaya Shrine Hike
The hike to Takaya Shrine takes around 40–60 minutes from the base, depending on your pace. The trail winds through a quiet forest with some steep sections, making it quite a workout—but the reward at the top is absolutely worth it!
While there’s an option to drive up to the shrine’s parking lot and skip the hike (more details about this option in my travel tips section ⬇️), I personally loved the journey on foot and the sense of accomplishment when being rewarded with the breathtaking view from the torii gate after a real cardio session!
How to Get to the Start of the Hike to Takaya Shrine
If you’re coming by public transport, it is essential to plan your transport in advance for this hike, as buses are not frequent in the area. The closest station to the trailhead is JR Kan-Onji Station, which you can reach in about 1 hour by express train from Takamatsu. From there, it's a 50-minute walk or a 30-minute bus ride (bus 11 from Kan-Onji Eki to
Muromoto bus stop) to the base of the hiking trail.
If you’re coming by car, there’s a small parking area near the start of the trail (see picture below), next to the lower shrine of Takaya Jinja, called Shimomiya (下宮). That's what I did, leaving in the morning from Takamatsu after, where I'd been for the previous few days.

Parking at the bottom of Mt Inazumi
Hike Up To Takaya Shrine with Me
Arrive at Takaya Shrine Parking and Follow the Road to the Start of the Trail
At the parking lot, you can take a moment to visit the Lower Shrine of Takaya Shrine next to the lot, and stop at the toilets here if needed (there are none on the trail). From the parking lot, you can then walk up the paved road toward the mountain.

The entrance of the trail is marked by a torii gate made of two tall stone pillars and a rope connecting them (注連石 on Google Maps). Nearby, you might notice a pile of long wooden sticks left there for hikers. If you’d like, you can borrow one for extra support on the climb.
Enjoy a Good Cardio Session as You Climb Mount Inazumi and Admire the Rewarding Views

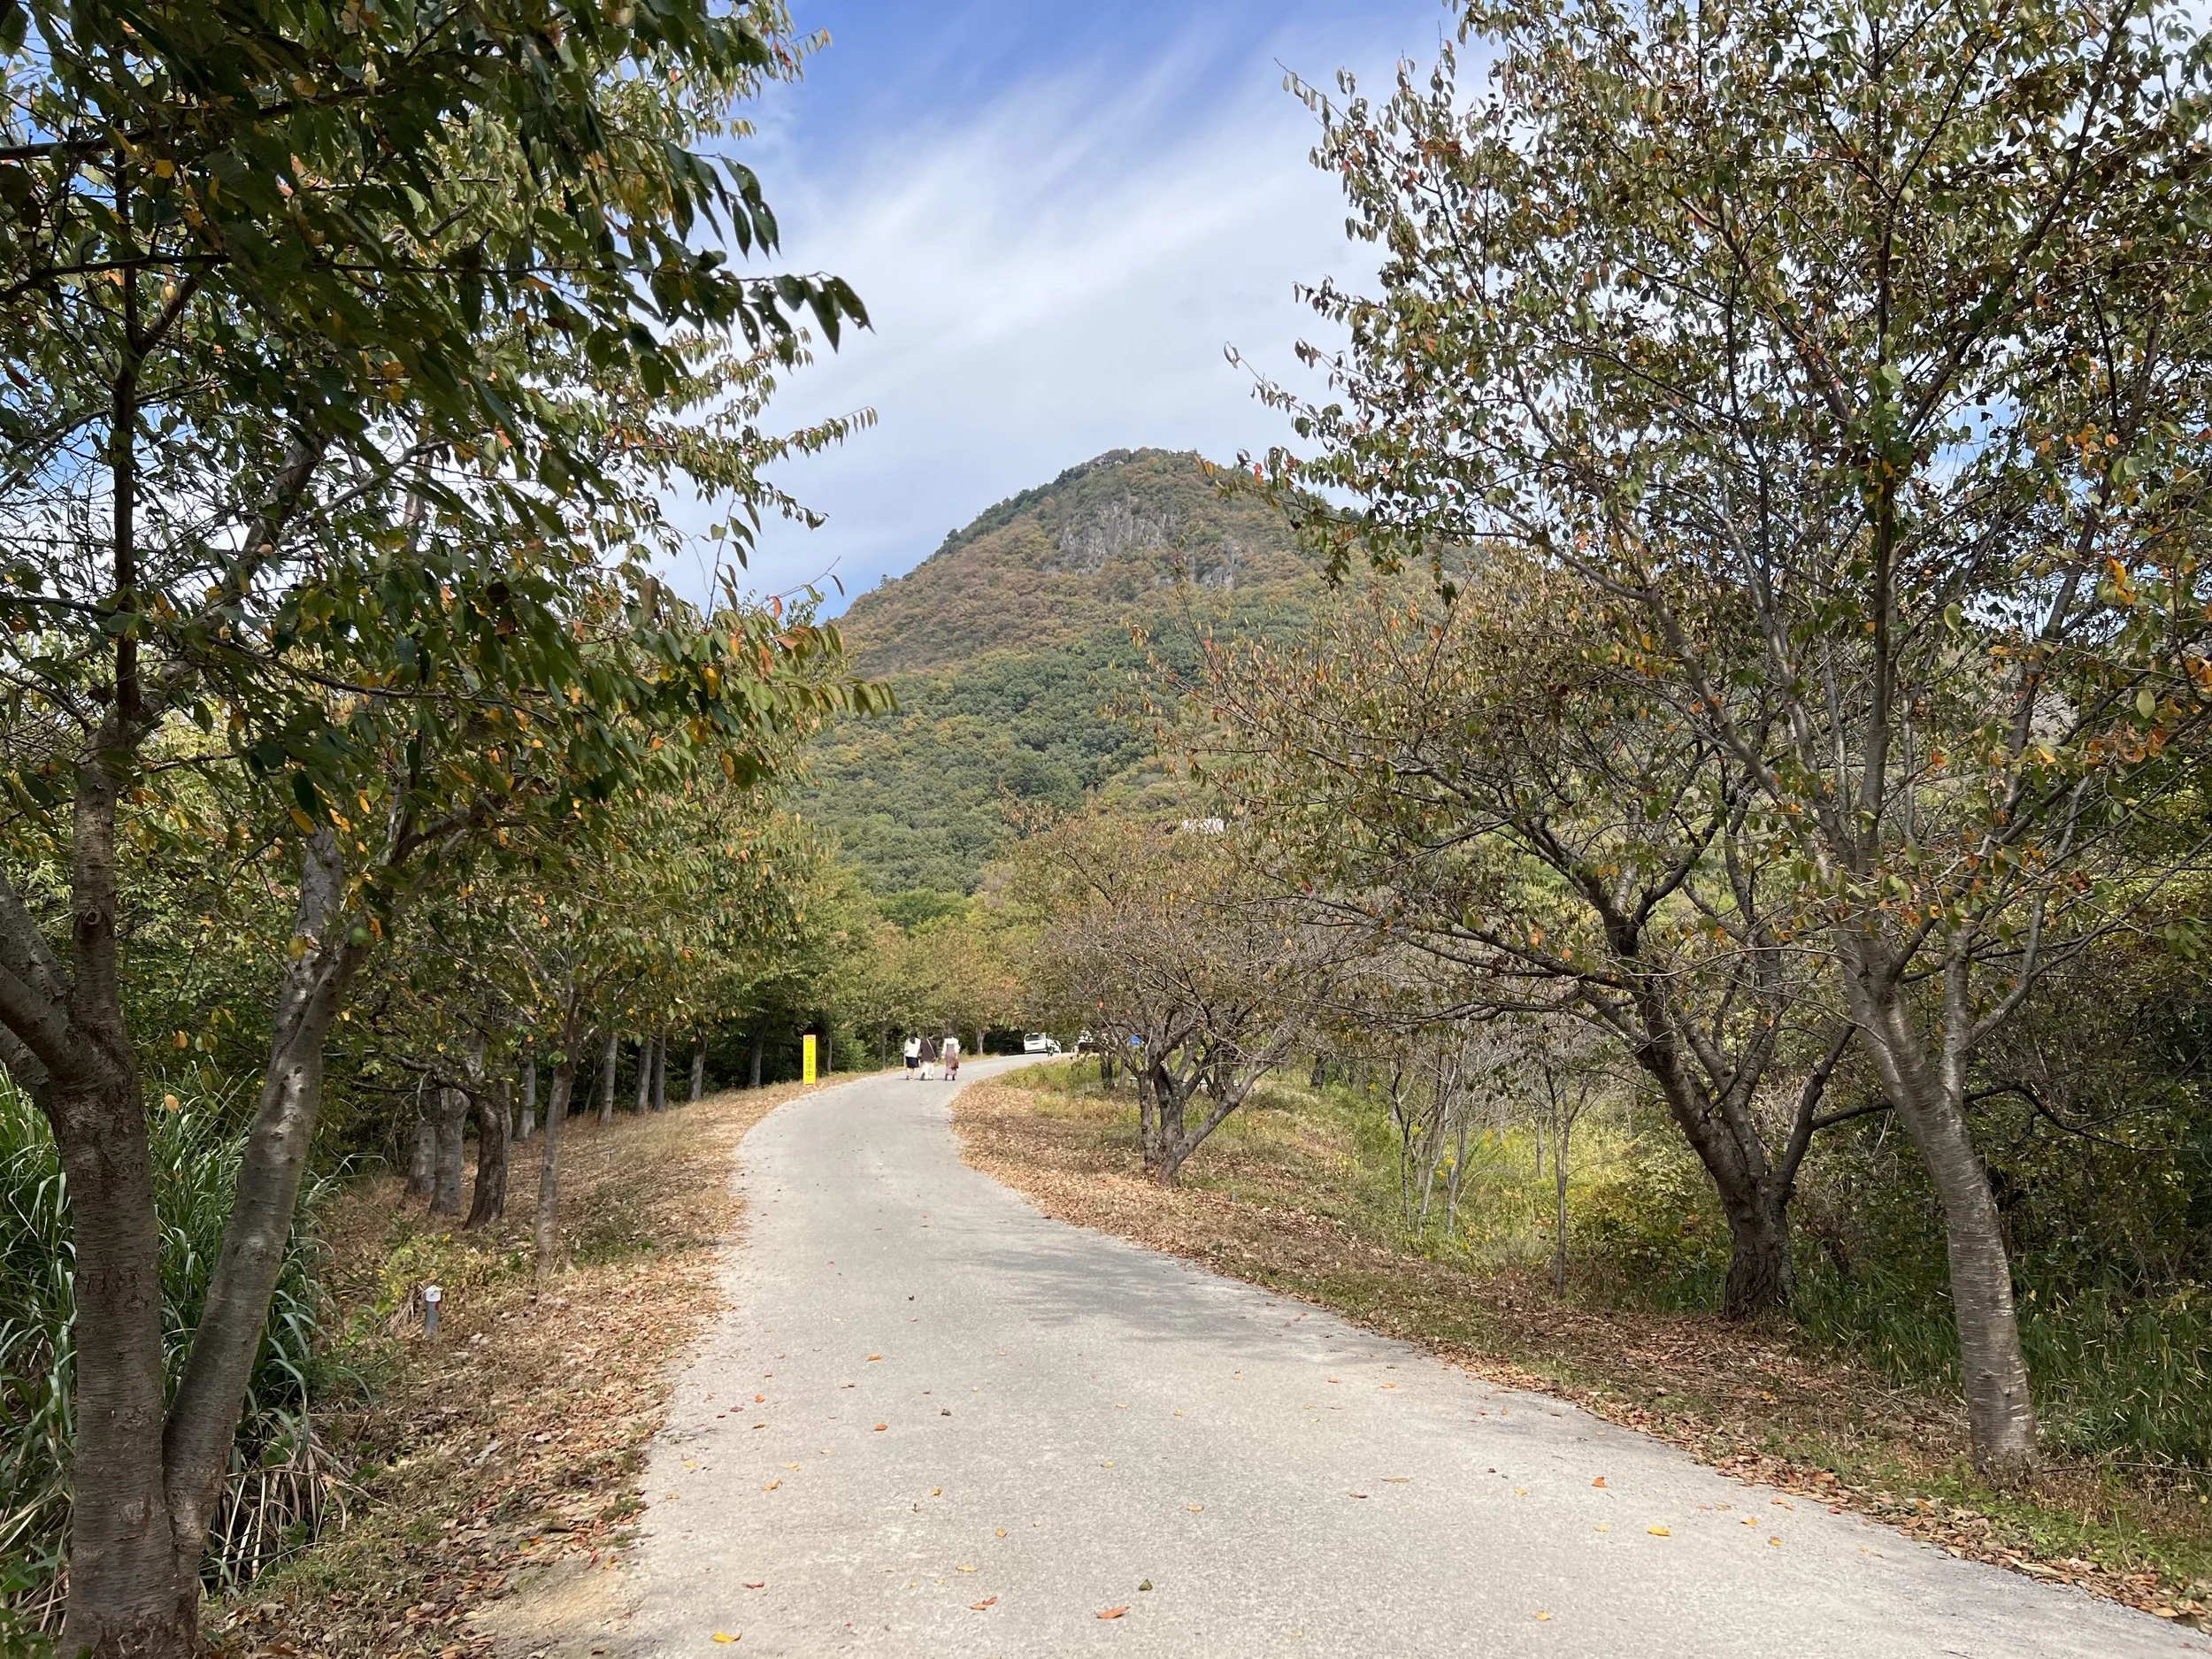
Time to hike! The forest trail winds its way up the mountain, with some sections that very steep and an uneven path. The ground can get slippery, especially after rain, so I highly recommend wearing proper hiking shoes for better grip. I’d say it takes about 30 minutes to hike up if you just keep going up without a break, but if you don't usually climb mountains or want to take breaks as you go, it will most likely take you at least 50 minutes or more.
As you ascent, you’ll start getting a first glimpse through the branches of the trees of the fantastic view that awaits you at the top of the mountain.


Path in the forest to Hanagoiwa
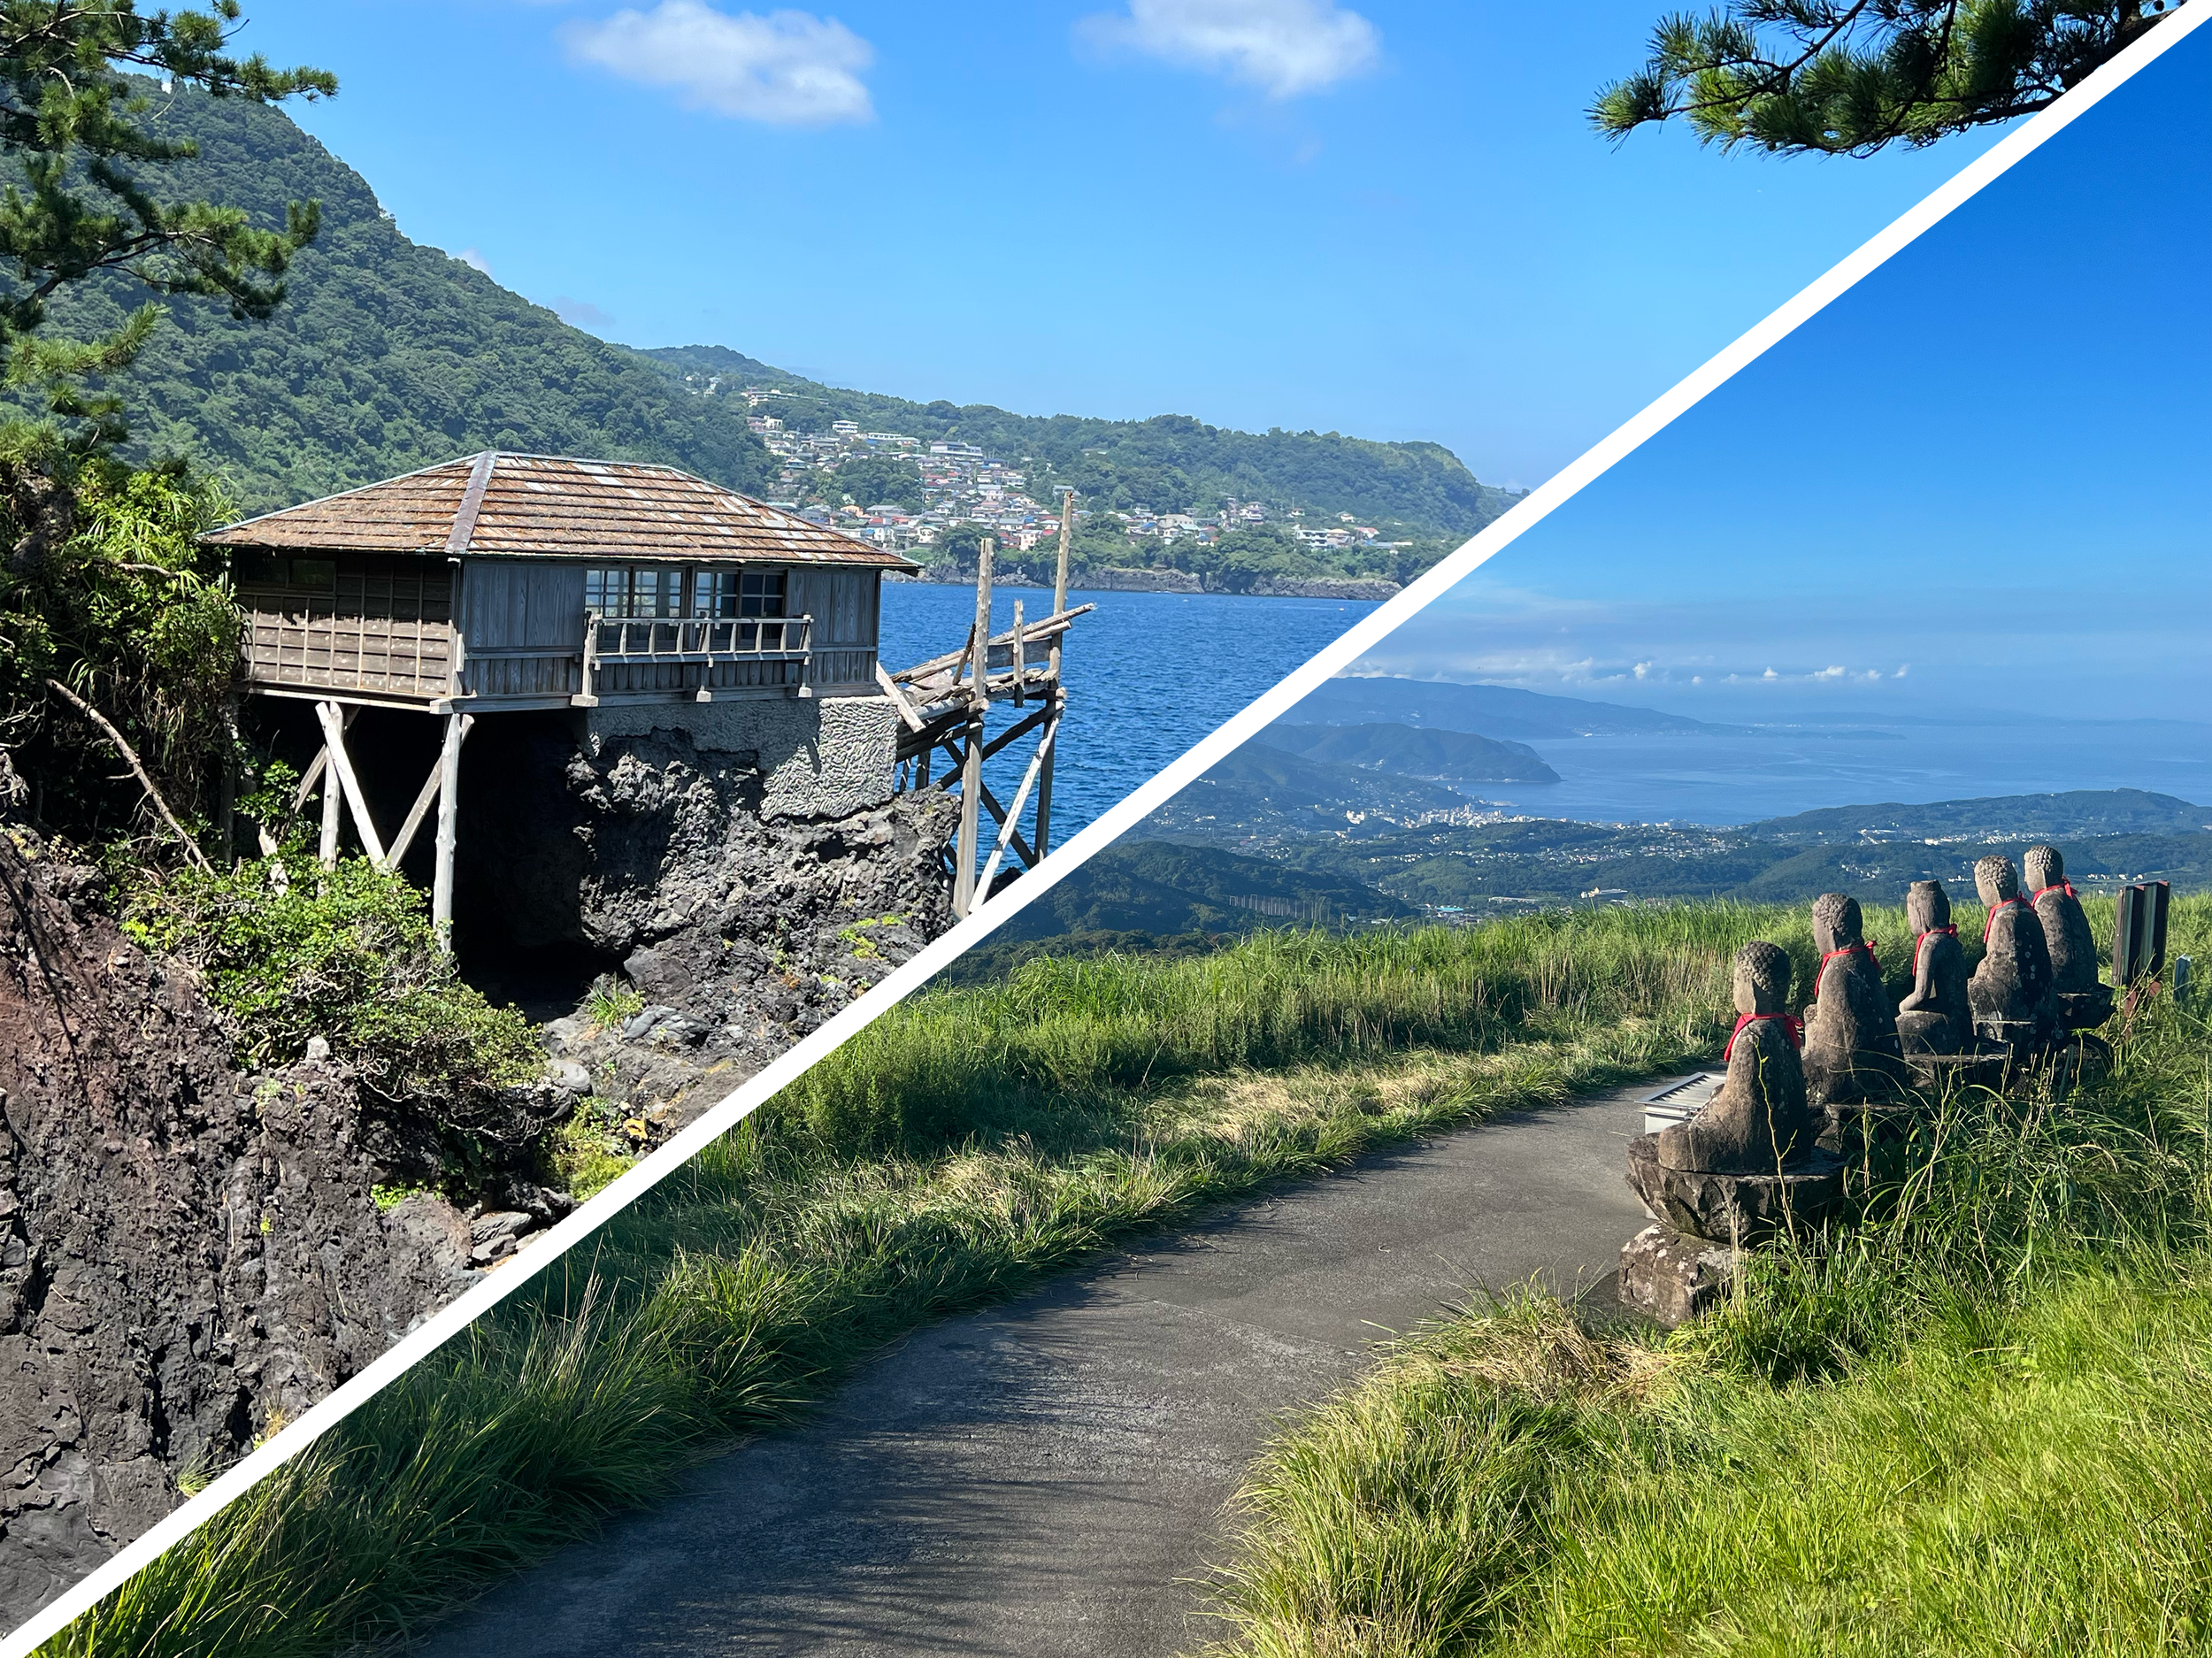
At some point, you’ll spot a sign with an arrow on your left pointing to a spot called Hanagoiwa (鼻ご岩). Don’t miss this little detour! This short, relatively flat detour leads to a spectacular view of the Seto Inland Sea (picture ⬇️).

It’s a perfect spot to soak in the scenery and take a break, before tackling the final stretch to Takaya Shrine. As you approach the summit, the final challenge awaits: a long, steep flight of stone steps leading up to Takaya Shrine. After the forest path, this last push may seem difficult, but the end is in sight! Halfway up the stone steps, there is a large rock sitting in the middle, called Yurugi no Iwa (ゆるぎの岩), which is said to move at the touch of a finger, but to never topple over.

Relax and Take in the Breathtaking View from Takaya Shrine’s “Torii in the Sky”

Reaching the top after the climb felt incredible! The panoramic view of the city, coastline, and Seto Inland Sea stretching beyond the iconic torii gate made every step worth it. There are a few benches where you can sit, rest, and just take in the scenery. I spent at least half an hour enjoying the peaceful moment before switching into a photo mode to capture the famous "Gate in the Sky." Since there’s a parking lot nearby, you’ll see more visitors who arrive here without hiking, so you might need to wait a few minutes your turn for a photo under the torii.


While at the top, you should check out a unique vending machine! Instead of drinks, it dispenses ema (wooden prayer plaques), omamori (protective charms) and other local souvenirs. I thought it was amazing! And don’t miss visiting Takaya Shrine itself.
Once you’re ready to head back, the descent is much faster, taking around 30–40 minutes. However, the trail can be slippery, especially with loose rocks and mud, so step carefully. You can take your time and enjoy the last moments of this hike before getting back to the parking lot.

Takaya Shrine

My Hiking and Travel Tips Before Visiting Takaya Shrine
When to Go
I’d say the best time to hike to Takaya Shrine is during spring and autumn when the weather is mild. You might even get extra stunning views with cherry blossoms or autumn foliage if the timing is right. I visited in early October and the temperature was just ideal! Summer can be hot and humid, making the climb more exhausting, while winter may bring icy or slippery paths, especially after rain, so you should prepare accordingly if you visit during those seasons.
Early morning or late afternoon is ideal for avoiding crowds and capturing the torii with softer lighting or sunset colors. I was at the Torii gate at around 1pm and the position of the sun was not great for taking photos.
Difficulty of the Hike
The hike is relatively short but intense, taking around 40–60 minutes up and 30–40 minutes down. While not extremely difficult, there are steep sections that require some effort, and the path can get slippery with rocks and mud. If you’re used to hiking and physical efforts, it’s a fun and rewarding challenge, but beginners should take their time and bring proper gear.
What to Wear and Bring
I’d highly recommend to wear proper hiking shoes with good grip, as the trail can be uneven and slippery. The slope is steep in some places, so it may be useful to carry a walking stick or use one of the wooden sticks left at the start of the trail. And don’t forget to bring plenty of water, and in the warmer months sunscreen and a hat, as it can get hot even under the trees. Also, there are no food stalls or vending machines on the way up or at the top, so if you want to enjoy a picnic at the summit, you'll need to bring your own snacks.
Alternative if You Don’t Want to Hike and/or Don’t Have a Car
If you prefer to skip the hike, you can drive up to the parking lot near Takaya Shrine and walk just a few minutes to the torii gate. Note that, to avoid congestion and because the mountain road is very narrow, private cars can only access the parking on weekdays only. If you don’t have a car, there is still the option of using the shuttle bus service that is available to take visitors to the main shrine on weekends and holidays only. I’d recommend you to check the local tourism information website that provides plenty of information about the different ways you can get to Takaya Shrine. You can also find more info on the shuttle bus service and timetable (in Japanese).
As a more general advice, while public transport is available, renting a car is one of the best ways to explore Shikoku, as many of its most beautiful spots are difficult to reach by train or bus. Roads are well-maintained, and driving gives you the flexibility to visit hidden gems like Takaya Shrine, as well as other nearby attractions such as Kotohira Shrine or Chichibugahama Beach. If you plan to explore beyond the main cities, I’d highly recommend renting a car to explore Shikoku, as it will save you time and make your trip much smoother!
Other Things to See and Do in the Area
There are other interesting spots to visit in the area. Just after hiking to Takaya shrine, I stopped at two temples that are part of the pilgrimage of the 88 temples of Shikoku, Jinnein Temple (第68番札所 神恵院/琴弾八幡 四国霊場) and Kannonji Temple (第69番札所 観音寺 四国霊場). Nearby, Kotohiki Park (琴弾公園) offers another interesting and unique sight. From a hilltop observatory, you can admire a giant sand sculpture of an Edo-period coin called Zenigata Sunae (銭形砂絵(寛永通宝)). The sand sculpture measures 122 m from east to west, 90 m from north to south, and has a circumference of 345 meters. Originally made in 1633, the sand sculpture is fixed twice a year by hundreds of local volunteers to maintain its appearance. It’s said that if you see it, you’ll live a long and healthy life, and have no money troubles.

Jinnein Temple

Zenigata Sunae
And as mentioned earlier, other nearby attractions are Chichibugahama Beach (父母ヶ浜), a popular spot for sunset views, and Kotohiragu Shrine (金刀比羅宮), a magnificent shrine in the mountains above the town of Kotohira (I'll be writing an article about this fantastic place in the near future).
Where to Stay In the Surrounding Area
If you're looking for a place to stay after the hike in the surrounding area, I highly recommend to go to Kotohira, home to the famous Kotohira-gu Shrine and a great destination on its own.
I stayed at Kotosankaku Hotel, and it was an excellent experience that I can warmly recommend. This fantastic hotel offers excellent value for money and embodies the best of Japanese hospitality, with beautiful interiors and spacious indoor and outdoor onsen public baths. Dinner was delicious and hearty and the buffet breakfast very impressive (with over 50 different Japanese and Western dishes). The hotel offers a variety of rooms (Japanese-style rooms, Western-style rooms, mixed rooms and special rooms with open-air bath) and various facilities to provide the perfect experience for guests, with an on-site izakaya, karaoke rooms, table tennis, games corner andmore. I also really appreciated the onsen experience there. There are two different onsens areas, as they are separated by gender, but they are swapped between evening and morning, so you get the change to experience both areas.
It was a perfect post-hike treat! If I were to visit Kotohira again, it's highly likely that I'll stay at Kotosankaku Hotel again as I was so pleased with the experience.

A corridor in Kotosankaku Hotel

Dinner with local produce
If you’d rather stay closer to Takaya Shrine, based on reviews, I’d recommend GLAMPREMIER Setouchi, with stylish glamping accommodations and stunning ocean views, making it a fantastic place to relax after a day of exploring.
➡️ You can check more options and availability of accommodation in the area on Agoda and Booking.
To Conclude
The hike to Takaya Shrine was one of my favourite experiences when exploring Shikoku, and the view of the ‘Torii in the sky’ has become one of my favourites in Japan. I look forward to introducing you to more of Shikoku's hidden gems in future articles, so stay tuned!
Interested in discovering more fantastic hikes in Japan? You can read about all the hikes I’ve done in Japan and written about.
Found this article helpful? Buy me a coffee. 😊
Want to stay in touch? Subscribe to my monthly newsletter (with latest articles, updates, travel tips and more...) delivered straight to your inbox. 📩

Some of the links in this Takaya Shrine Hiking Guide are affiliate links. At no extra cost to you, I may earn a small commission when you click on them and make a purchase. And if you do, thanks for your support! Purchasing through these links is a great way to support Travely Notes, as this helps with the costs of running my blog.